2Hats Team has released an IoT driven Smart Switch in 2020 Circuit Diagram First, make all the necessary connections as per the circuit diagram and upload the program to the ESP8266 WiFi Module. After the program is uploaded, you will get a confirmation message regarding WiFi connection and Static IP Address. Now open the Android App which we developed using MIT App Inventor 2 and installed it on your Android Phone.

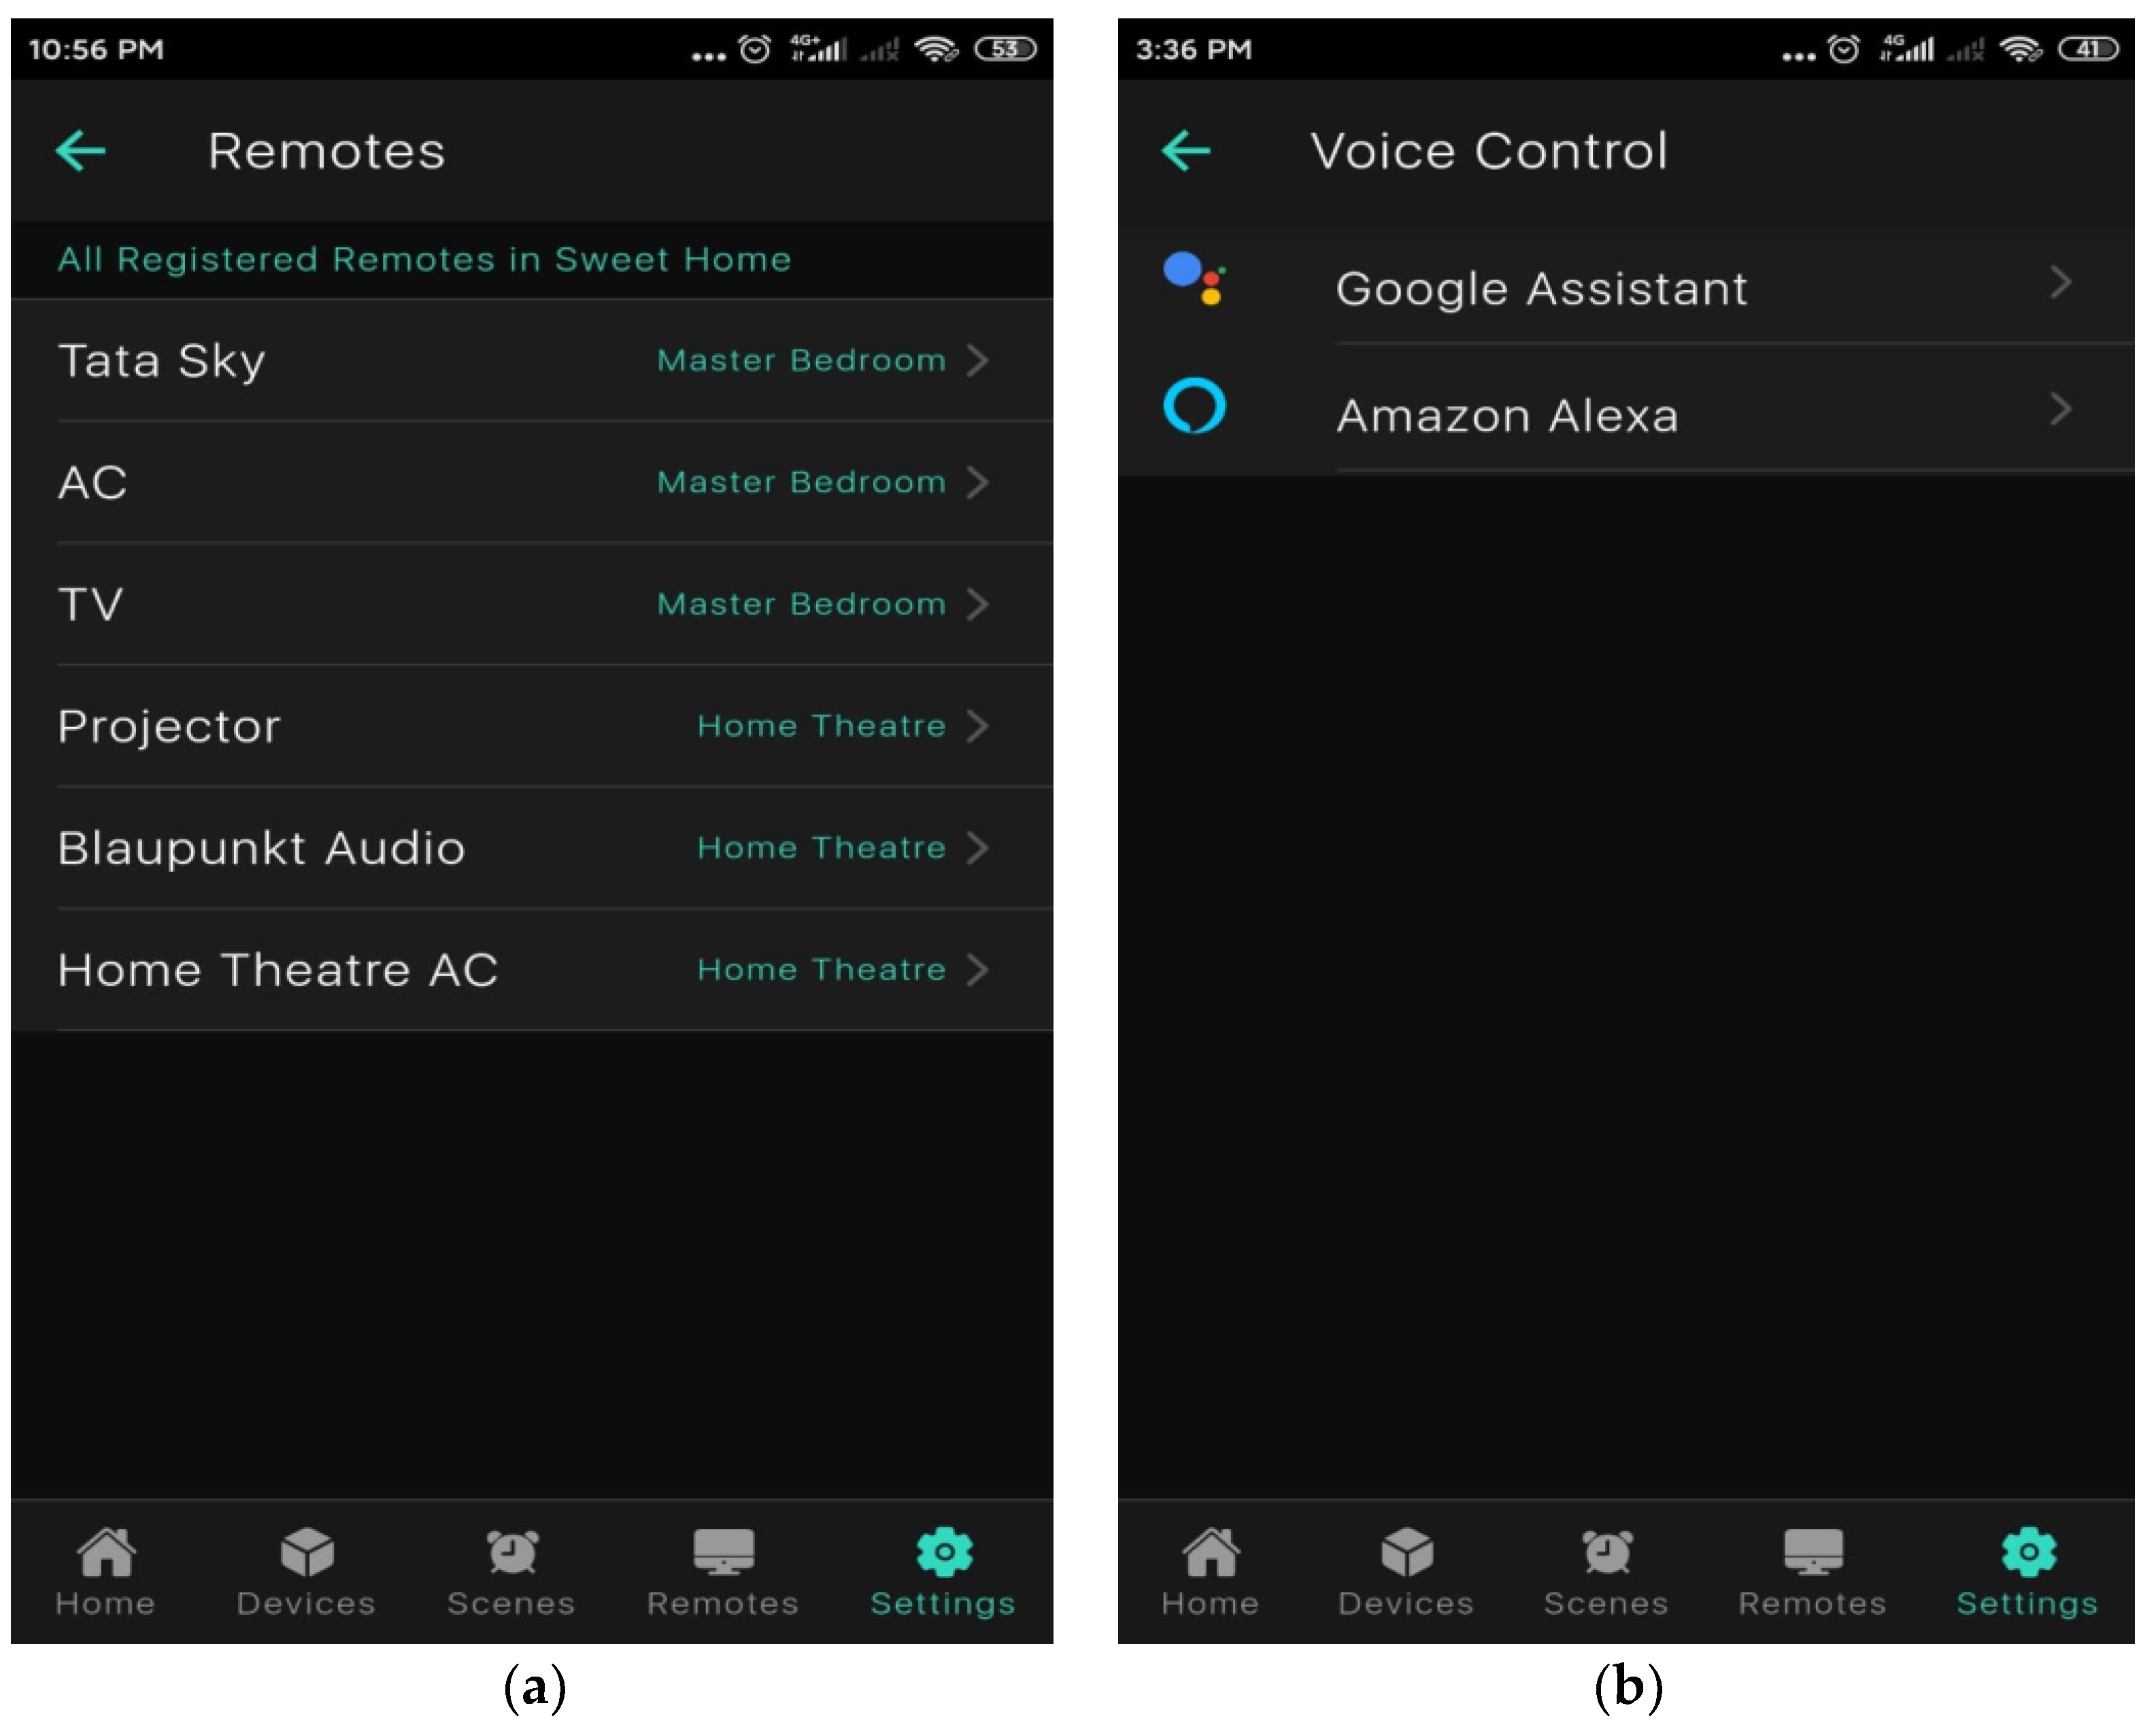
In this tutorial we will learn to build an IoT Smart Switch with Firebase and custom app for Android mobile phones. One way to implement an IoT smart switch is to use a platform like Firebase to store and sync data in real-time. Firebase is a cloud-based real-time database service that can be used to store and sync data for web, mobile, and IoT How to make IOT and Manual Switch Control Home Appliances using Firebase Server and MIT App Inventor | IOT Home AutomationHow To Build Custom Android App usi
MIT App Inventor + Firebase Server Home Appliances Control Circuit Diagram
In this video you will learn to build IoT Switch with Firebase and custom Android app. We are using ESP8266-01 along with an Android app to control the hard Our example shows an assembling smart relay controlled via the mobile app. We will connect an ordinary table lamp through a relay, making it smart. The light will be controlled from a smartphone using the 2Smart Cloud app and voice commands, a phone call, or the Telegram bot. What we used to assemble this device: How to make IOT and Manual Switch Control Home Appliances using Blynk | Home Automation ProjectCode and Schematics Download link:- https://github.com/embedde
Download the Smart Switch Position code, below. Here's your download! Smart Switch Position code (.ino) Mount the IoT Switch to an outlet using the two existing screws on your light switch plate. After the switch is mounted, plug the USB cord into the Wemos and your computer and give it a few seconds to initialize. Upload the code to your Wemos. Step 2: Make a DIY Sonoff Smart Switch Use Wemos and Relay, Button Shield Here you only need the Wemos board, relay, button and dual base shield with the header pins soldered. You will easy to assemble it because it only stacked several shields together as in the picture, check the orientation of the pin not to reverse.